Showing posts with label Betty Crocker. Show all posts

Friday, October 28, 2011

Pumpkin Cheesecake Swirl Brownies


Oh brownies, how I love to make you even better.  I'd given some of the Pumpkin Chocolate Chip Bars to my in-laws and learned they lasted mere minutes in their house.  So when Dave and I went over for dinner later in the week, I knew a pumpkin flavored dessert was in order.  These are based on my Brownies recipe, and the pumpkin is a perfect match for the fudgy and moist brownies.  I love how they look, they taste magnificent and the balance of pumpkin to chocolate is ideal.  Dave loved how the pumpkin was clear and definitive without tasting like pumpkin pie.

Stumbling around the web for pumpkin flavored desserts, I saw the idea of these at Betty Crocker.  I used that recipe to create the filling, but the brownies come from my previously posted Brownies (rather than a box.  But by all means, use a box if that's what you want to do.)  If you're having a Halloween celebration, you can't miss with this recipe.  The colors and flavors are perfect, you get enough for a crowd and the colors work with the holiday theme as well.  I do note below that I would have made one change to the preparation of the filling (and I should have recognized to do that before I made the filling, but oops), but otherwise, these are perfect.

Wednesday, October 19, 2011

Candy Bar Cookie Pops


My nephew turned 8 this week.  Where does the time go?  Keeping with the birthday baking theme with my nieces this year (Stained-Glass Flower Lollipops and Colorful Cookie Pops), I wanted to create a similar treat for him too.  And, being that Halloween candy (in tiny fun sized portions) is plenty available this time of year, these were the perfect treat.  Plus they were easy to pull together from a prepackaged mix and five other ingredients, including the sprinkles.  This is a perfect recipe to make with kids if you want to get them involved in the kitchen. I made these with Milky Ways and the nougat and caramel really cut the super chocolately cookie. 

Researching kid-friendly recipes, I found this recipe at Betty Crocker and am totally pleased with it. You could use any candy bar that would yield to a popsicle stick.  The recipe calls for "milk chocolate covered candy bars with chewy caramel and crispy crunchies" but standing in the candy aisle at Target, I could not for the life of me figure out what those were.  Any guesses?  So, to the Milky Ways it was.  I must have made my cookies a little big because I only got 20 pops, not the 28 it calls for, but I was very concerned about the caramel leaking out.  Fun and cute, these are perfect birthday treats, for a bake sale, or just to use up leftover Halloween candy.

Tuesday, September 20, 2011

Chunky Banana Chocolate Chip Cookies


It's been a while since I've made cookies.  And since bananapalooza continued in my freezer, I thought these would be a nice treat to use some of them.  Dave, Cindy and I had a hard time describing these cookies.  They are delicious and soft, but the texture is unlike any other cookie I've made.  Moist and chewy aren't even the right words to describe them. They aren't cakey or airy.  They're supple and have a very nice mouthfeel (besides awesome flavor).  They're almost like a denser muffin top.  Ok, so since I can't describe them, you'll just have to make them yourself to figure out what I'm talking about!

The combination of banana, chocolate and walnuts isn't new but the delivery of these fine friends in a wonderful cookie is enjoyable.  Perhaps the texture came from the mixing method--I threw caution to the wind and followed the recipe by mixing all the "wet" ingredients (butter, sugar, bananas, eggs, vanilla) together without creaming the butter and sugar first.  It went against all my instincts but I had to try it out.  The original recipe, from Better Crocker, also called for vanilla frosting, but I don't think they need it.  I also didn't have it.  I did have a smattering of chocolate frosting and used it up on a few cookies, but they were fine without the extra decorations.  Even though I used my medium cookie scoop, I still got more cookies than the recipe called, so you could probably go bigger.  These would be a fun back to school treat, perfect for a bake sale, or tuck the recipe away for holiday baking.

Tuesday, June 7, 2011

Orange Creamsicle Cookies


I have been dreaming of these little guys ever since I made the first Cherry Cordials back in October.  And they turned out exactly like I expected.  Dave commented that they really did taste like an orange creamsicle with a lovely blend of orange cookie and white chocolate.  Don't let the pictures scare you--I'm terrible with my camera and couldn't figure out how to balance the light so the orange wasn't so intense.  They are actually much paler than they appear.

These bake up quick thanks to prepackaged mix and flavor from orange gelatin.  They'll be a great addition to your summer cook outs.  Sandwich two cookies together with a little vanilla ice cream, pop them in the freezer for 15 minutes and you've got a treat that everyone will be craving.

Tuesday, May 31, 2011

Cranberry Apricot Bars


Oh, these are good.  But to be fair, they are much better the next day.  I made these one evening for a work meeting the next day and they weren't cool enough to cut before bed.  However, they cut perfectly in the morning and were a big hit.  I made them again as part of birthday baking for my mom (she loves apricot) and when I tried cutting the after the recommended 45 minute cooling period, they just weren't the same.  You really need to wait for the honey glaze to harden up a bit and form a solid layer.  Everyone who had them on both days agreed they were better after waiting.

Another Betty Crocker recipe, I picked it because it looked easy to make and I had the ingredients on hand.  What can I say, sometimes my criteria aren't that impressive.  But they are delicious.  Perfect for fruit lovers and great for brunch or a morning snack.

Monday, May 23, 2011

Peanut Butter Candy Tarts


Perhaps it is a mild obsession with my mini muffin pan.  But I really wanted to try a twist on Peanut Butter Blossoms.  I actually made these for Dave's Easter basket when I found the Butterfinger and Crunch eggs.  They surprisingly kept their shape.  Unfortunately the Crunch eggs and the Butterfinger eggs look exactly the same when they are unwrapped, so I lost track of which were which flavor.   It was a fun surprise for Dave.  I also used what remained of the Reese's Cups after the bag sat on the counter for a week and I kept having "just one."

The recipe didn't really come from anywhere--but since it's a packaged mix, we'll say it was inspired by Betty Crocker.  You could use whatever candy you have on hand, but I the rounder the better.  They'll keep their shape and look cute in the little tart cups.


Peanut Butter Candy Tarts


Ingredients
1 17.5 ounce package Betty Crocker Peanut Butter Cookie mix
3 Tablespoons oil, called for on package
1 Tablespoon water, called for on package
1 egg, called for on package
3 dozen chocolate candies (such as Reese's Cups, Butterfinger or Crunch eggs, or Hershey's Kisses), unwrapped

In a medium bowl, mix together cookie mix, oil, egg and water until a soft dough forms.


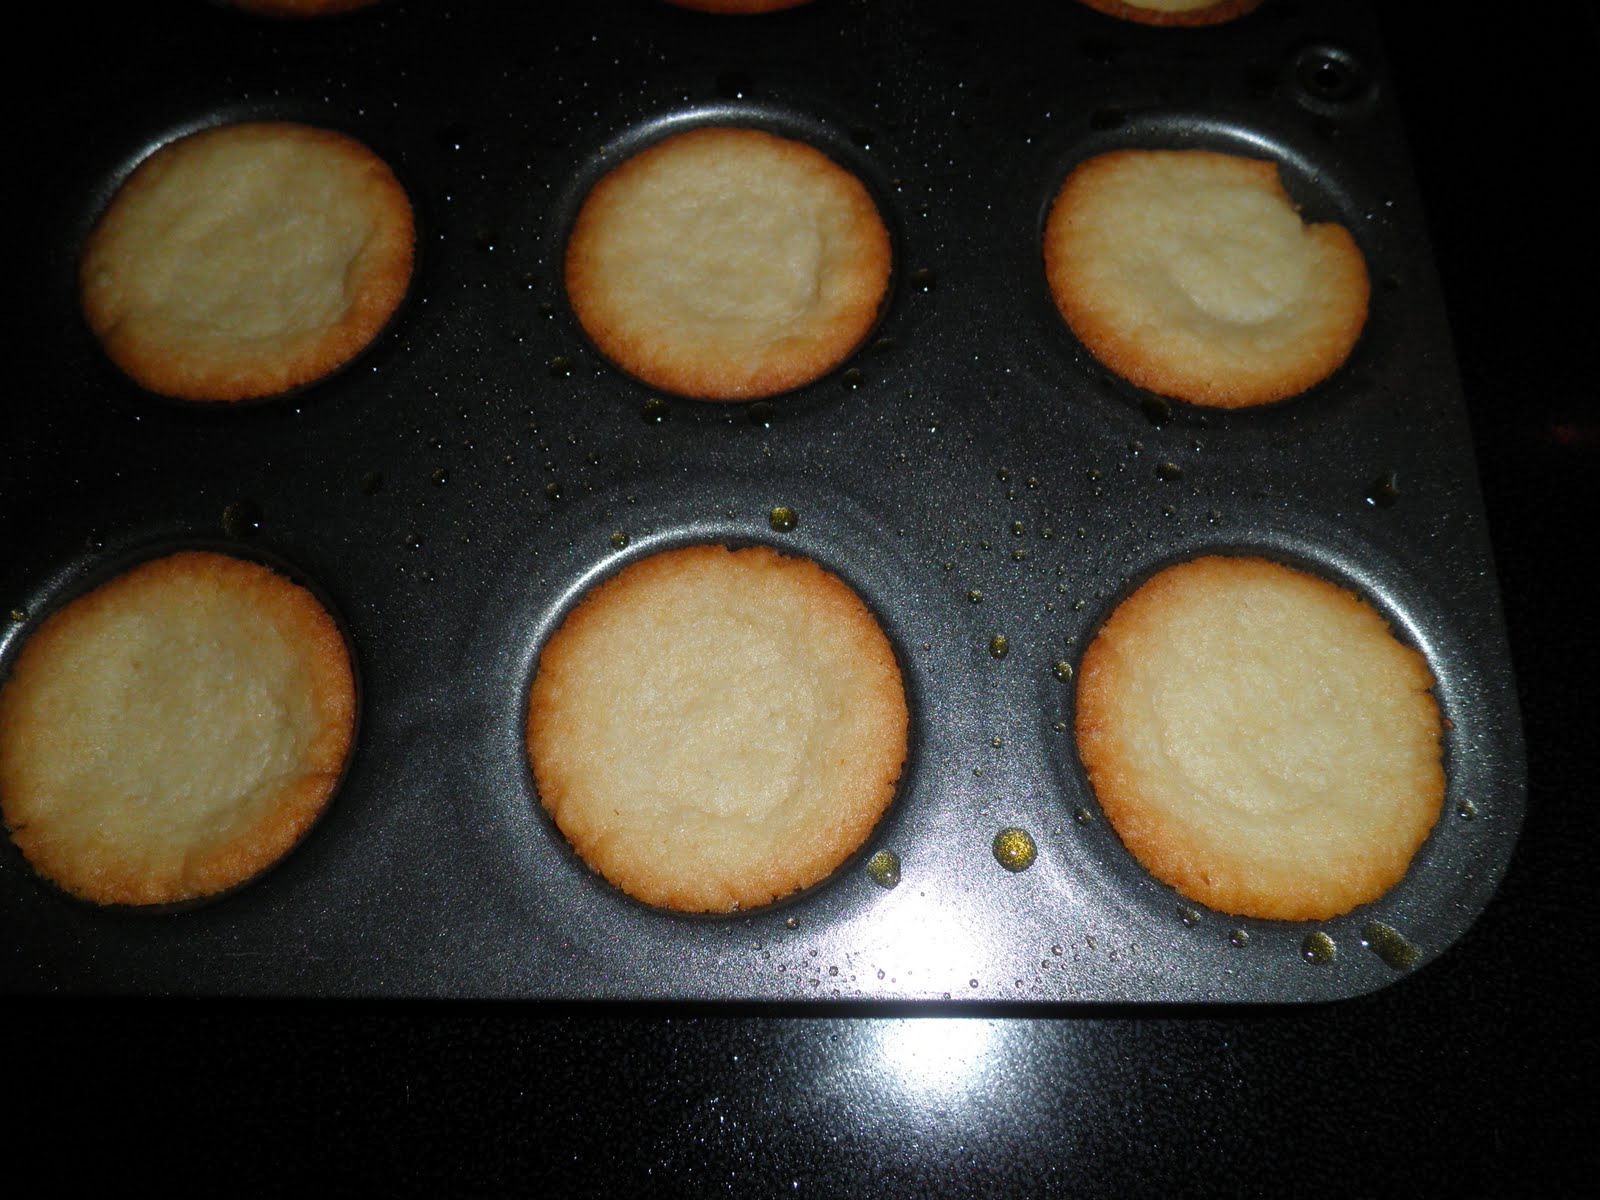
Using a small cookie scoop, scoop dough into the cups of a greased muffin tin.  Using a tart shaper or shot glass, press dough into the bottom and up the sides of each mini muffin cup. 


Bake at 350 degrees F for 9 minutes.  Remove from oven and press one candy into the center of each tart.


Allow tart to cool slightly in pan, then remove to cool completely on wire racks.


Makes 3 dozen cookie tarts.

Happy Baking,
The Cookie Princess

Monday, April 25, 2011

Turtle Cookie Cups


These are amazingly good.  (So good I apparently forgot to take a display photo.)  Another very simple recipe using a prepackaged mix to have a great dessert or treat, plus it's a candy-cookie combo, so I know it's a winner.  I took these to work for a meeting and everyone loved them.  They are very chocolatey so be warned, but they certainly live up to their name with the caramel and pecan cutting through with a sweet/salty flavor.

Again, from the Betty Crocker website, these were easy to prepare and because I'm obsessive, I actually have all the ingredients in the house on a regular basis.  You could experiment with different candies and nuts, but just be warned--then they won't be turtles. 

Turtle Cookie Cup


Ingredients

1 pouch (17.5 ounces) Betty Crocker double chocolate chunk cookie mix
3 Tablespoons oil (as called for on package)
1 Tablespoon water (as called for on package)
1 egg (as called for on package)
36 chocolate covered caramel candies, unwrapped
36 pecan halves

In a medium bowl, mix together cookie mix, oil, water and egg until all is moistened and you have a soft dough.


Grease the cups of a mini muffin tin (mine holds 24, so I worked in batches).  Using a small cookie scoop, scoop dough into each muffin cup.


Bake at 375 degrees F for 8-9 minutes.  Remove from oven and press a chocolate covered caramel into the center of each cookie cup.  I found that pushing them in upside down gave me more of the effect I wanted.


Top with a pecan half.


Cool in pan for a few minutes, then remove to wire racks to cool completely. Repeat with remaining dough.

Makes 36 cookie cups.

Happy Baking,
The Cookie Princess

Wednesday, April 20, 2011

Monkey Bread


"Monkey's make good bread," said Dave.

Can't really get a much better description than that, huh?  Add to that, like the scones, Dave had never heard of or had monkey bread before.  Honestly, I'm not sure if I've had it--if so, it's been a long time and I'd never made it.  But last week I got several emails with recipes for monkey bread, so I figured it was an omen and time to give it a try. 

So easy.  This recipe came from Betty Crocker and used a prepared mix that I happened to have on hand, which is why I chose this version of the recipe.  And while it would seem the gooeyness comes from a similar process last week's Almond Toffee Bars, since these remained gooey and not brittle, the texture and taste were different, resulting in a very yummy snack/breakfast/dessert.  We may or may not have just eaten this standing over the counter and pulling off pieces of bread while the dog sat at our feet anxiously waiting for nuggets to fall.

Monkey Bread


Ingredients

3 cups Biquick mix
2 Tablespoons sugar
1/4 cup butter, melted
1/4 cup milk
1 teaspoon vanilla
3 eggs
1/4 cup sugar
1/2 teaspoon cinnamon
1 cup butter
3/4 cup brown sugar, packed

Note: Penzey's Baking Spice is pictured, but I ended up not using it. I thought I would add it to the batter and didn't.  Next time I would add a teaspoon to the batter to give the bread another level of flavor throughout.

In a large bowl, stir Bisquick, 2 Tablespoons sugar, 1/4 cup melted butter, milk, vanilla and eggs until a soft dough forms.


Turn dough out onto a flexible cutting mat and divide in to 24 pieces.  Don't worry if they aren't exactly even.


In a small bowl combine 1/4 cup sugar and cinnamon.


Spray a fluted pan with cooking spray and set aside.  Note: I used a silicone pan and still sprayed it, just in case.  A little extra spray won't hurt anything in this situation.  Also, note that my pan has a design to it.  For this recipe, it doesn't really matter if it's flat sided or not because the bread will make it's own shape.


Roll dough pieces into balls and then roll in cinnamon sugar mixture.


Scatter the coated balls in the prepared pan.  Sprinkle remaining cinnamon sugar on top of the dough in the pan.


In a medium saucepan, melt 1 cup of butter, then stir in brown sugar and heat to boiling, stirring constantly.


Boil for 2 minutes and remove from heat.


Pour  caramel mixture over dough balls in pan.


Bake at 350 degrees F for 25 minutes or until lightly browned.  Let cool in pan for 3-5 minutes and then turn out onto a plate.


Cool 10 minutes and serve warm.


Makes 1 loaf.

Happy Baking,
The Cookie Princess

Printer Friendly Recipe

Pin It

Thursday, April 14, 2011

Strawberry Cream Cheese Cookie Tarts


These are so good.  And pretty.  But mostly let's focus on how good they are.  I took these for dessert when Dave and I went to dinner at his parent's house and they were a big hit.  My father-in-law actually couldn't eat the second one for a few minutes because he "just needed to savor that for a little while."  Yup, they're good.  The cookie dough is sweet and the strawberry cream cheese has a sweet but light flavor.  Top it all with a fresh strawberry and it's the perfect spring treat.  These would be great for a bake sale, Easter dessert, or a baby shower. (Do they make blueberry cream cheese?  Because that would be cute with blueberry's for garnish and then you can cover both sexes.)

I found this recipe on the Better Crocker website.  I thought I was going to make cheesecake but then realized I didn't have enough time.  So I had to think fast and find something using ingredients I already had in the house.  It almost worked.  I thought I could do this with regular cream cheese and flavor it (either vanilla or orange).  Turns out you really do need the whipped flavored cream cheese to get the consistency you want.  I suppose if I had whipped the regular brick of cream cheese first it might have worked out.  But alas, I ended up sending Dave to the grocery store (again).  The price he has to pay to get yummy treats.

Strawberry Cream Cheese Cookie Tarts


Ingredients

1 pouch Betty Crocker sugar cookie mix
1 stick of butter, softened (as called for on cookie mix)
1 egg (as called for on cookie mix)
1 8-ounce container strawberry cream cheese spread (pretend the brick in the picture is a tub of strawberry cream cheese)
1 cup powdered sugar, sifted
1 Tablespoon milk
1/2 cup fresh strawberries, washed and sliced

Make cookie dough as directed on package (mix together cookie mix, butter and egg until a soft dough forms.)


Roll dough into 1 inch balls and place in a greased mini muffin tin. 


Press each ball into the bottom and up the sides of the muffin cup.  I used my handy tool (the mini tart shaper from Pampered Chef), but a slim shot glass may also work.


Bake at 350 degrees F for 12-15 minutes or until edges are brown.  Remove from oven. 


My cups started to puff up, so I pressed them down again (while still warm in the pan), indenting the "cup" shape with my tart shaper.


Cool slightly and then remove from pan and cool completely on wire racks.  Repeat with remaining dough (the original recipe says this makes 32 cups, but I got 40; my mini muffin tin only has 24 cups).

While cups are cooling, mix cream cheese, powdered sugar, and milk in a medium bowl.


Mix with a mixer on medium speed until smooth. 


Transfer to a pastry bag fitted with a star tip.  Pipe cream cheese mixture into each cup.


Garnish with fresh sliced strawberries.  Store in the refrigerator until ready to serve.


Makes 32-40 cookie tarts.

Happy Baking,
The Cookie Princess

Thursday, April 7, 2011

Almond Toffee Bars


Apparently, these are good.  I'm not being passive aggressive, but I didn't realize until I tried these that I'm not particularly fond of toffee.  And apparently neither is Dave.  They aren't bad and I did eat a whole bar, but I just wouldn't reach for this flavor necessarily.  But, they got rave reviews when I took them into work, so I'm listening to my audience.

I randomly picked this recipe from the Betty Crocker website when searching for a bar recipe to bring into work for a morning meeting.  I wanted something with enough "breakfast" overtones that it wouldn't turn everyone off at 9:30 in the morning, but also something that would transcend the rest of the day as leftover snacks.  This worked.  I did use a different size pan. (Who has this elusive 15 x 10 x 1 inch pan?)

Almond Toffee Bars


Ingredients

3/4 cup butter, softened
1/3 cup granulated sugar
1 egg
2 cups flour
1 cup butter
2/3 cup brown sugar, packed
1/4 cup light corn syrup
1 1/2 cups almonds, coarsely chopped
1 cup semisweet chocolate chips

In a large bowl, beat 3/4 cup butter and granulated sugar with an electric mixer until light and fluffy, scraping sides of bowl as necessary.  Beat in egg.


Beat in flour on low speed (especially if you didn't change out the beater attachment like I did).  The dough will be relatively crumbly, (like the Cinnamon Bars) but I should have switched to the paddle attachment because I find the beater breaks up the dough into finer crumbs and it doesn't the consistency I want.  I ended up adding a splash (less than a Tablespoon) of milk just to get it to come together.


Grease bottom and sides of a 9 x 13 inch pan.  Press dough evenly into pan.


Bake at 350 degrees F for 13-18 minutes (I did 15 minutes) or until edges are light golden brown.

Yes, I realize there is little difference in the before and after baking pictures. These are slightly browned, though.

At this point, if you're like me, you'll realize that you only have a 1/2 cup of butter left and will bat your eyelashes at your husband until he goes and gets more butter.  If you're not like me, you would have read the recipe correctly and have enough ingredients.  (Thank goodness we live less than a mile from the grocery store.)

While you're waiting for the butter to arrive, coarsely chop almonds.


When butter magically appears (thank you, honey!), in a heavy sauce pan, heat 1 cup of butter, brown sugar and corn syrup to boiling over medium hear, stirring frequently.


Boil 2 minutes without stirring.


Quickly stir in almonds.


Spread over baked layer. (Would you believe I was able to time all this so the baked layer came out of the oven just as I was done stirring in the almonds?) 


Bake 15-20 minutes or until dark golden brown and bubbling (16 minutes worked for me).


Immediately sprinkle chocolate chips evenly over the hot bars.


Let stand for 5 minutes and when the chips are slightly melty, gently swirl the chocolate over the bars with a spatula.


Let cool completely, about 30 minutes.  Cut into squares (5 x 6 rows).  The chocolate will still be soft, so you may want to let them set up longer.

Makes 30 bars.

Happy Baking,
The Cookie Princess

Printer Friendly Recipe

Pin It